How to Get Wavy Hair at Home
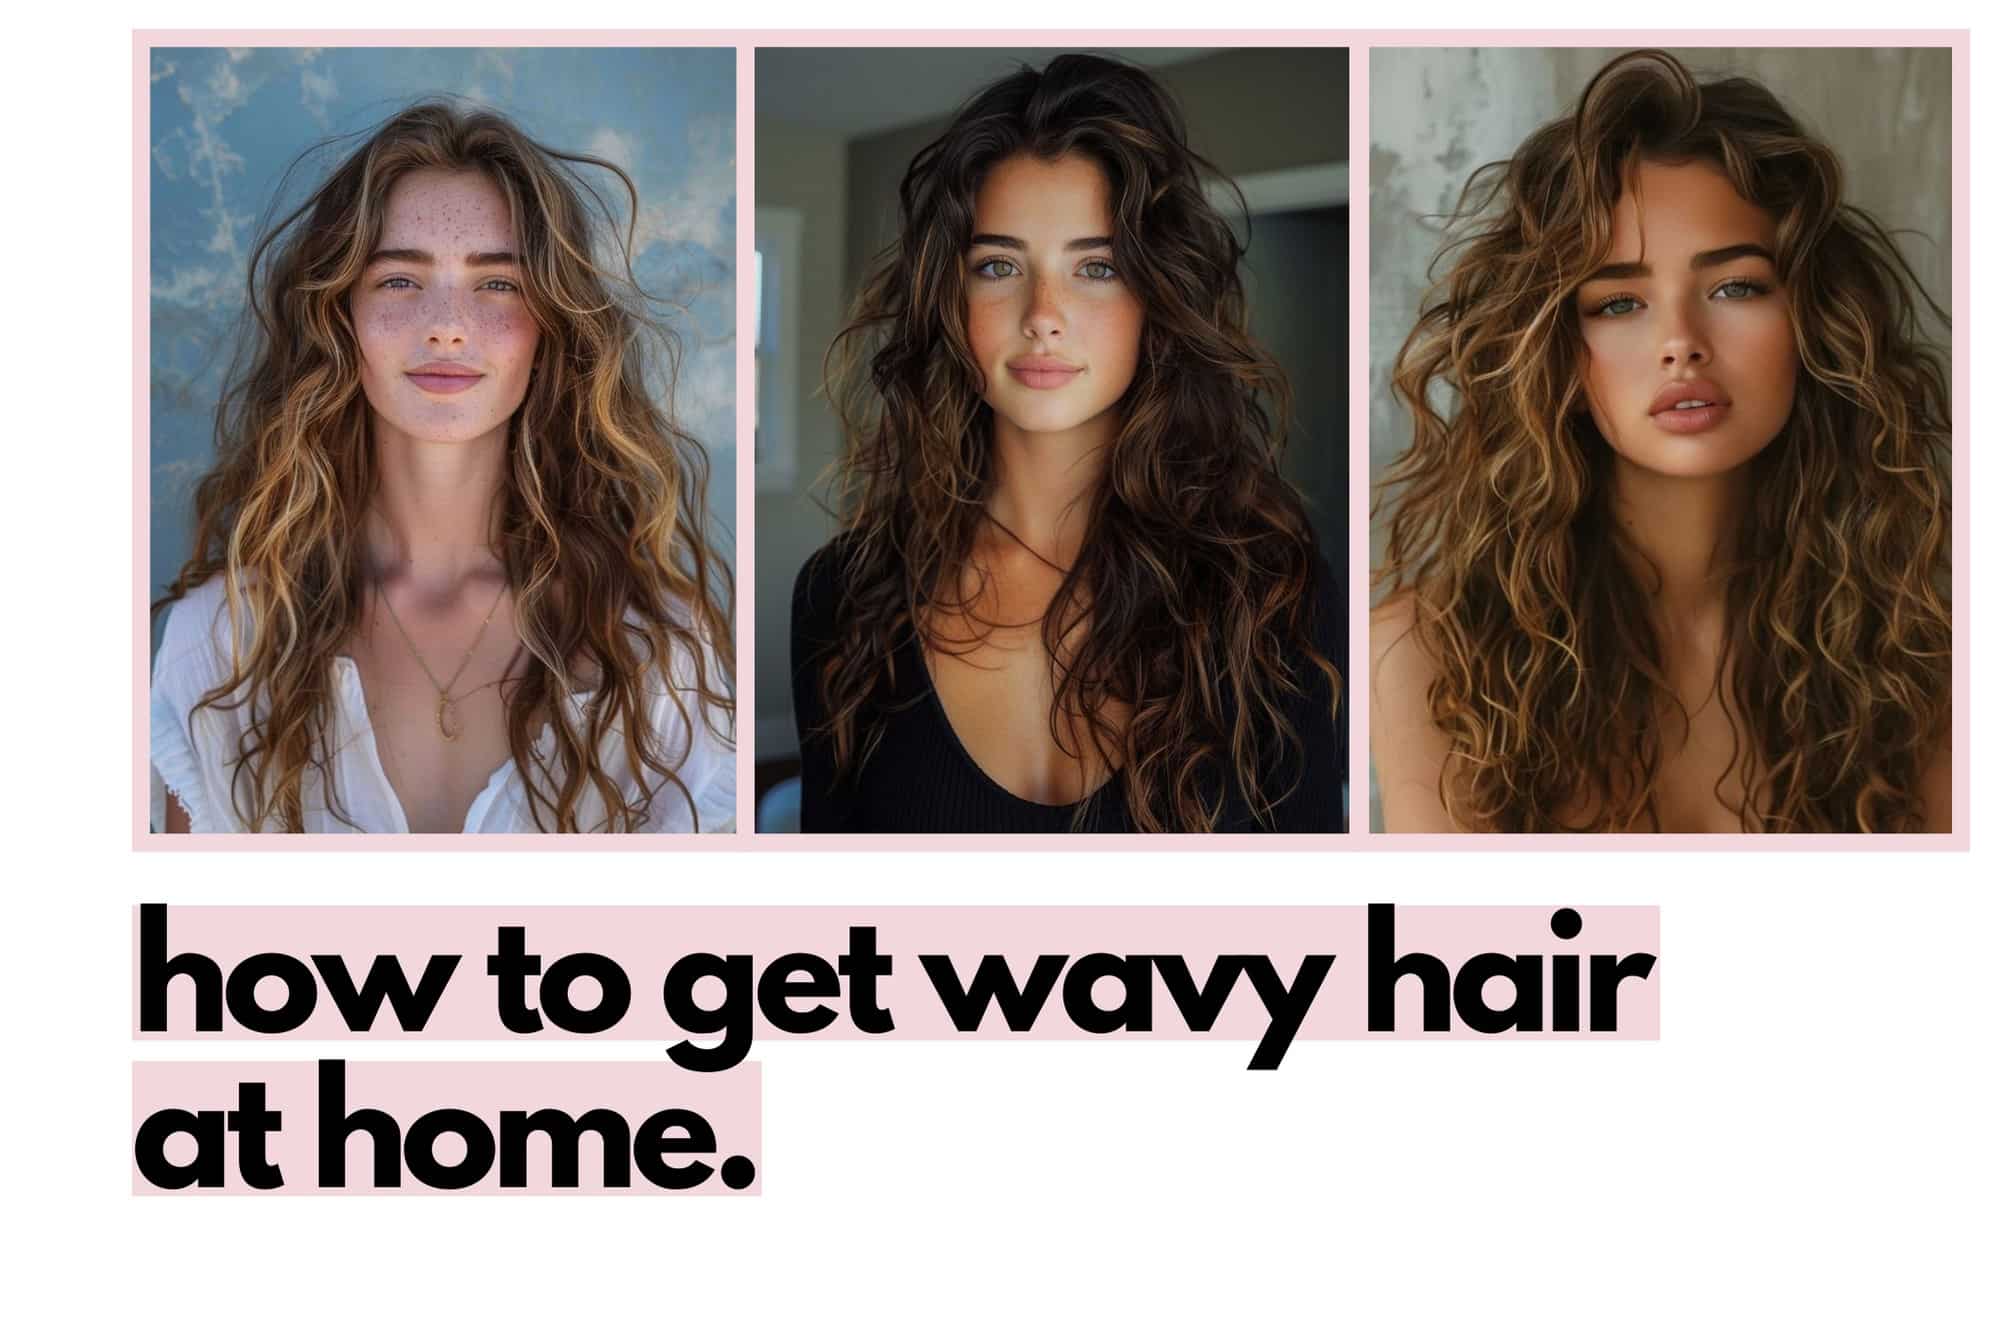
Wavy hair is often seen as the perfect balance between straight and curly, combining volume with a carefree texture. It’s a versatile look that can be dressed up for glamour or kept casual for an effortless vibe. From beachy waves that remind you of a day by the ocean to soft, romantic curls for a night out, the appeal of wavy hair is universal. Many women desire this look because waves add movement and softness to any hairstyle, enhancing femininity and style without looking overly styled or stiff.
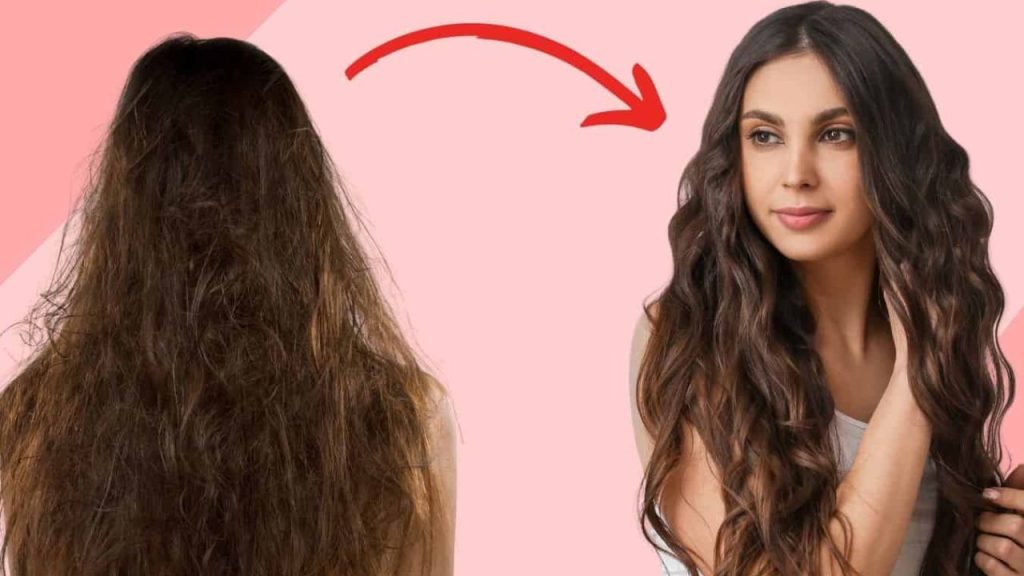
The great news is you don’t need a salon trip to achieve gorgeous waves. In this article, we’ll explain how to get wavy hair at home using a variety of wavy hair techniques suitable for all hair types. Whether your hair is stick-straight or naturally curly, there’s a method to help you achieve waves at home. We’ll cover everything from heat-based styling to natural wavy hair methods that don’t require any heat at all. By the end, you’ll have step-by-step guidance on multiple techniques, tips for making those waves last, and a clear idea of what mistakes to avoid. Read on to discover how to transform your hair into beautiful waves right from the comfort of your home.
Understanding Your Hair Type

Before diving into the methods, it’s important to understand your hair type and how it might respond to different wavy hair techniques. Women’s hair can range from very straight to very curly, with varying thickness and texture. Knowing where your hair falls on this spectrum will help you choose the best approach to achieve waves at home and adapt the method to your needs.
- Straight Hair (Type 1): Straight hair often has a smooth texture and can sometimes be challenging to hold a wave. If you have fine, straight hair, you might need to put in a bit of extra effort to create and maintain waves. For example, using a texturizing spray or sea salt spray before styling adds grip and makes it easier to hold a curl. You may also need to use higher heat settings (with caution and heat protectant) or stronger hold products to make waves stay. On the upside, straight hair is a blank canvas – with the right technique, you can get wavy hair even if your hair is naturally very straight. (Pro Tip: To add volume on fine straight hair, gently backcomb at the roots before creating waves – this lifts the hair and makes your waves look fuller.)
- Wavy Hair (Type 2): If you already have some natural wave or bend in your hair, you’ve got an advantage. Wavy hair usually has an “S” shaped pattern and offers a bit of texture and volume on its own. Your focus should be on enhancing and defining those waves while taming frizz. Heat-free wavy hair methods like scrunching with product or braiding overnight work especially well for you, since your hair is predisposed to forming waves. Be careful with using too much heat, as wavy hair can be prone to dryness or frizz if over-styled. Instead, use methods that enhance your natural wavy texture. Regular hydration and frizz-control products will be your friends to keep waves smooth and bouncy (we’ll cover specific tips on this later).
- Curly or Coily Hair (Type 3 and 4): Curly and coily hair has lots of natural curl pattern. You might think “my hair is already curly, do I need to know how to get wavy hair?” Many women with very curly hair sometimes want to loosen their curl into a soft wave for a change of style. The key here is loosening the curl. This often means starting by stretching or slightly straightening the hair (for example, blow-drying it smoother or doing larger braids) and then using a method to form looser waves. Using a large-barrel curling iron can relax tight curls into gentle waves, or putting curly hair into twists/braids can reshape the curl into a wave. Because curly hair is usually drier, always prep with a good conditioner or leave-in cream, and use a heat protectant if applying any heat. Also, avoid over-manipulating curly hair; once you’ve styled it into waves, don’t comb or finger-comb too much so you don’t introduce frizz. (Pro Tip: For naturally curly girls, try styling on “stretched” hair – for instance, braid or band your wet hair to stretch it out as it dries, then use a waving method. This reduces shrinkage and helps the hair take a wavy shape.)
- Thick or Coarse Hair vs. Fine Hair: Aside from curl pattern, consider the thickness of your strands. Coarse or thick hair can be resistant to styling and may require more heat or longer time to set the wave. Fine hair is more delicate and can be easily weighed down by heavy products. If your hair is thick, working in small sections and using adequately heated tools (not too low a temperature) will help imprint the wave. If your hair is fine, you’ll want to use lighter products (a lightweight mousse instead of a heavy cream) and possibly slightly cooler tool settings to avoid damage. In all cases, sectioning your hair while styling will ensure even, consistent waves throughout. Failing to section properly is a common mistake that can lead to uneven waves or frizz (more on mistakes to avoid later).
By understanding your hair type, you can pick the wavy hair technique that’s best suited for you and tweak the method for the best results. Now, let’s move on to the fun part – the methods to get wavy hair at home, step by step.
Methods to Get Wavy Hair at Home
There are several wavy hair techniques you can do yourself, broadly falling into three categories: heat-based methods, heat-free methods, and product-assisted methods. We’ll explore each category and give you a step-by-step guide for each technique so you can recreate beautiful waves. Choose the approach that fits your hair type, the tools you have available, and how much time you want to spend.
(Note: For any method involving wet hair or overnight setting, remember to start with hair that is damp, not soaking wet, so that it can dry completely and form a wave. And for any heat styling, always apply a heat protectant product beforehand to shield your hair from damage.)
Heat-Based Methods
Heat-based methods use styling tools to form waves using heat, giving you quick results. These are great if you want instant waves or need a more defined style. The most common tools are curling irons, flat irons (yes, you can create waves with a hair straightener!), and hot rollers. Below, we break down how to get wavy hair at home using each of these tools.
Using a Curling Iron
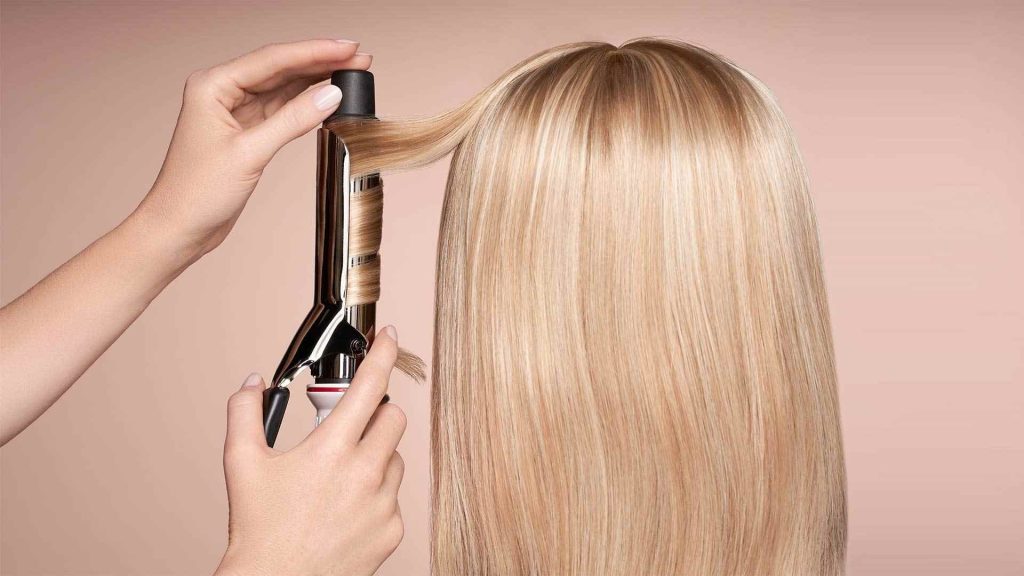
Curling irons are a classic tool for creating waves or curls. You can achieve anything from loose beachy waves to more defined curls depending on the barrel size and technique. For natural-looking waves, a medium to large barrel (around 1 to 1.5 inches) works well. Here’s a step-by-step way to create waves with a curling iron:
- Prep Your Hair: Start with completely dry hair (styling with a curling iron on damp hair can damage it). Apply a heat protectant spray from mid-length to ends, and make sure it’s distributed evenly. If your hair tends to resist curls, you can also work a bit of light-hold mousse or texturizing spray through it for extra hold before you begin.
- Section Your Hair: Divide your hair into sections to make curling easier. A common approach is to split hair into a top half and bottom half. Clip the top half out of the way, so you can start curling the bottom layers first. Within each half, you can further section into 2-3 parts depending on hair thickness. Working in small sections ensures each wave comes out defined and even.
- Wrap Hair Around the Barrel: Heat up your curling iron to a suitable temperature (around 300°F for fine hair, 350-400°F for thick hair, but never max out to avoid damage). Take a one-inch section of hair. If your curling iron has a clamp, you can either use it or skip it for a more modern wave. Point the curling iron downwards (tip facing the floor) and wrap the section of hair around the barrel, away from your face. Leave about an inch of the ends out of the iron if you want that relaxed, beachy look (not curling the very ends gives a more natural wave). Be careful not to overlap hair too much on the barrel to heat it evenly.
- Hold and Release: Hold the hair around the iron for roughly 8-10 seconds (a bit less if your iron is very hot or if your hair is fine; a couple seconds longer for hard-to-curl hair, but be cautious with time to avoid damage). Then gently release the curl. Catch the coiled hair in your palm or let it cool in that coiled shape if possible – letting curls cool in shape helps them set stronger.
- Repeat Around Your Head: Continue curling sections of hair, working your way through the bottom section and then the top section. For a more natural result, alternate the direction of the curls on different sections (some away from the face, some toward the face). However, always curl the pieces framing your face away from your face for a flattering wave pattern.
- Loosen into Waves: After curling all sections, let all your hair cool down completely. Your curls might look a bit tight or separate at first. To get soft waves, gently run your fingers through the curls or use a wide-tooth comb to break them up. Flip your head over and give the roots a little shake, then flip back – this adds volume and relaxes the curls into tousled waves. You can also lightly brush out the curls for a looser wave if desired (use a brush with flexible bristles or a wide-tooth comb to avoid frizz).
- Set the Style: Finish with a light mist of hairspray or a flexible hold spray to set your waves. A flexible hold spray will keep the shape without making your hair crunchy, allowing your waves to move naturally. If you have any frizzy bits or want more shine, smooth a drop of hair serum or a lightweight oil on the ends and mid-lengths.
Pro Tip: For visual learners, it helps to watch a demo. You can find excellent YouTube tutorials demonstrating how to wave your hair with a curling iron (try searching for “beachy waves curling iron tutorial”). Many beauty blogs also offer step-by-step photo guides; for example, Allure’s online guide shows how using a curling wand and leaving the ends out creates modern, relaxed waves. Checking out a quick video or image guide can give you a better sense of how to hold the iron and wrap the hair for the best results.
Using a Flat Iron
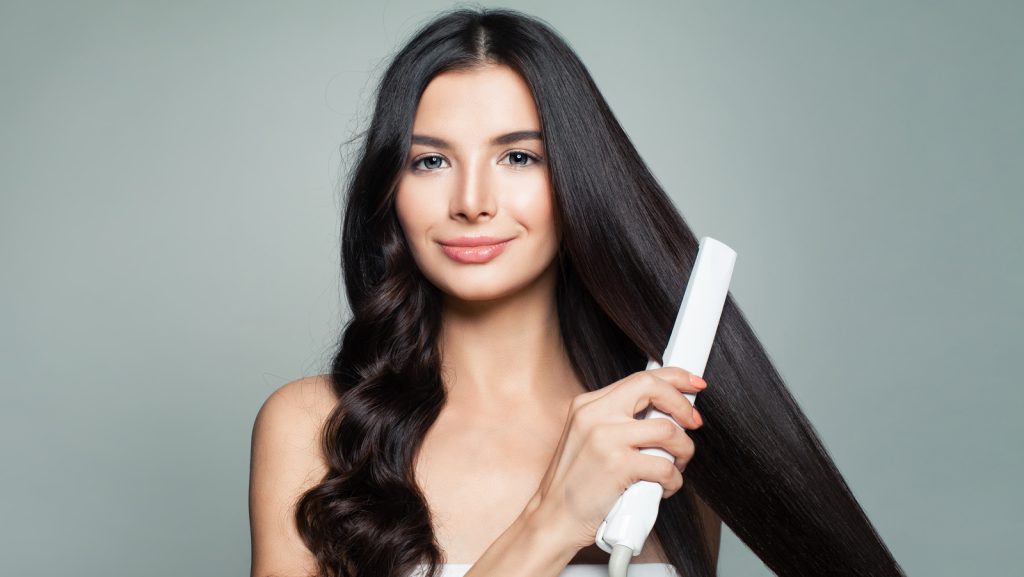
It might surprise you, but a hair straightener (flat iron) can double as a wave-making tool. This is handy if you don’t have a curling iron around, or if you prefer the type of wave a flat iron creates – often a bit looser and “cool-girl” looking. There are a couple of techniques to use a flat iron for waves; we’ll outline one popular method here:
- Prep and Section: As with the curling iron, start with dry, heat-protected hair. Comb through a heat protectant and make sure hair is tangle-free. Section your hair into manageable parts (halves or quadrants, depending on thickness) so you can work methodically.
- The Twist-and-Glide Method: Take a 1 to 2-inch section of hair (wider sections for looser waves, smaller for tighter waves). Clamp the flat iron near the root of that section. Now twist your wrist so that you rotate the flat iron 180 degrees (a half turn) away from your face, with the hair still clamped in it. Slowly glide the flat iron down the length of the hair while in that rotated position, then release. This motion is very similar to how you’d curl ribbon with scissors – the flat iron’s tension and heat will create a curl. The result is a spiral curl which you can gently pull on while it’s warm to loosen into a wave. If done with a slight rotation and quicker glide, it yields softer bends rather than full curls.
- The “S-Wave” Clamp Method (Optional): Another way to create waves with a flat iron is the “pressing S-waves” technique. This one doesn’t involve sliding, but rather shaping the hair in an S pattern. Take a section of hair and begin about two inches down from the root. Using your fingers (carefully, since you’ll follow with a hot iron), bend the section back and forth in a serpentine “S” shape. While holding that shape, clamp the flat iron over each bend for a second or two and then move down the section, continuing to feed the hair in an S shape through the iron. Essentially, you are pressing a wave shape into the hair. This creates a very natural-looking wave and is great for medium to long hair. It might take a little practice, but it results in those effortless-looking waves. Remember not to slide the iron, but to “stamp” it on the hair as you form each bend, as this sets the wave without creating a uniform curl.
- Work Through All Sections: Continue with either method around your head. With the twist-and-glide, you may alternate the direction of your rotation (twisting the iron toward the face on some sections and away on others) for a more irregular wave pattern. With the S-wave clamping method, ensure each new section’s wave starts in the same direction as the last to keep a consistent pattern (unless intentionally going for a messy wave look).
- Finish and Set: Once all sections are waved, let your hair cool. You will likely have slightly tighter waves/curls at ends from the twist method; you can gently tug on those or even lightly run the flat iron over just the very ends to relax them if needed. Use your fingers to tousle and separate the waves. If you want more volume, you can lift at the roots and even spray a bit of texturizing spray at the crown. Finally, mist your hair with a light hairspray to hold the waves. For extra shine or if your waves look a bit matte, use a tiny bit of hair oil or shine spray on the lengths, but sparingly to avoid weighing the waves down.
Pro Tip: If you’re new to using a flat iron for waves, watching someone do it can be incredibly helpful. Look up a “flat iron waves tutorial” on YouTube – there are plenty of stylists and beauty vloggers showing both the twist glide and the S-wave techniques. You’ll see how they rotate the iron and how the hair looks as it passes through, which can boost your confidence in trying it. This method can feel a bit awkward at first, but once you get the hang of the wrist motion, you’ll be able to achieve quick waves with your straightener.
Using Hot Rollers
Hot rollers might sound a bit old-school, but they are a fantastic at-home tool for achieving voluminous waves with minimal effort. They’re also gentler on your arms since the rollers do the work while you can relax for a bit. Modern hot roller sets heat up quickly and come in various sizes; using the larger rollers will give you big, loose waves, while smaller rollers will give tighter curls. Here’s how to use hot rollers to get wavy hair:
- Prep Your Hair: Start with dry hair, and apply a heat protectant or a setting spray lightly through your hair. Hot rollers generally use less direct heat than curling irons, but it’s still wise to protect your strands. If your hair is very straight and slippery, spraying a light mist of flexible hairspray or setting spray can give it some grip to hold the waves.
- Heat the Rollers: Plug in your hot rollers and let them heat up according to the product instructions. Most sets have an indicator to tell when they’re ready (often a dot on one roller that changes color when hot). While they heat, you can section your hair. Plan to use the largest rollers on the top sections of your hair where you want the most volume, and smaller ones on the lower sections or any shorter layers.
- Section and Roll: Section your hair into at least three main parts: two sides and one top/crown. You can do more sections if you have very thick hair. Starting at the top/front (the bangs or front of the crown area), take a section of hair about as wide as the roller. Comb it straight up (90 degrees from your scalp) and then start wrapping the ends of the section around the roller. Roll it down toward your scalp, keeping tension so the hair wraps smoothly. Secure the roller with the clip or pin that comes with your set. Continue this process, working your way through all sections. Typically, you’ll place rollers mohawk-style along the center of your head, and then rollers on the sides. For wavy hair, use the larger diameter rollers on the top for lift and looser wave, and medium ones on sides. If you only have one size, that’s fine too – you’ll still get waves.
- Cool Completely: One key to using rollers is letting them cool completely in your hair. The cooling process is when the wave “sets.” Follow the manufacturer’s recommended time (usually 15-20 minutes). You can touch a roller and if it’s no longer warm, it’s ready to come out. Use this waiting time to do your makeup or have a cup of coffee!
- Remove Rollers Carefully: Gently unclip and unwind each roller without yanking. Start with the ones that were put in first (they’ve been in the longest) or simply go in reverse order of how you put them in. As you remove a roller, cup your hand under the curl and let it fall into your palm to support it until all rollers are out. Initially, the curls might look very tight or structured.
- Tousle into Waves: Use your fingers to comb through and break up the sections. Unlike the curling iron method, you generally won’t need to brush hot roller curls much, because they tend to be looser to begin with (especially if you used big rollers). Simply running your fingers through and shaking the roots should be enough to transform those ringlets into soft waves. If it still looks too curly, a wide-tooth comb or a paddle brush can be gently brushed through the curls to relax them.
- Finish with Spray: As always, finish with a light hairspray to help those waves last. You can also use a bit of volumizing spray at the roots if you want extra lift, since hot rollers often give a nice lift at the crown. A shine serum can be smoothed on the ends if needed, especially if your hair tends to frizz.
Pro Tip: If you’ve never used hot rollers, don’t worry – it gets easier after the first try. Many hot roller kits come with a little diagram for suggested rolling patterns, and you can also find illustrated guides on beauty blogs or YouTube. Try searching for “hot rollers tutorial” to see the rolling technique and placement. Seeing where to put each roller on the head can help you understand how to section your own hair. Once the rollers are in, you’re free for a while – it’s one of the easiest ways to multitask your styling time!
Heat-Free Methods

Not everyone wants to use heat on their hair, and luckily there are heat-free wavy hair methods that can produce beautiful waves without a curling iron or wand. These natural wavy hair methods typically involve styling the hair when it’s damp and letting it dry into a wavy shape. Heat-free methods are gentler on the hair (no heat damage!) and often require setting the hair for a few hours or overnight. They are perfect if you want to achieve waves at home with minimal hair damage – you can even sleep while your waves form.
We’ll discuss a few popular no-heat techniques: braiding, twist buns, the headband curl method, and other overnight wave tricks. For all of these, start with hair that is slightly damp (around 80% dry) – too wet and it won’t dry by morning, too dry and the shape may not hold well. You can lightly mist dry hair with water or a leave-in conditioner spray to get it damp. Also, using a bit of product like a styling mousse or a sea salt spray on damp hair before you style can help the waves set better and last longer.
Braiding (Overnight Waves with Braids)
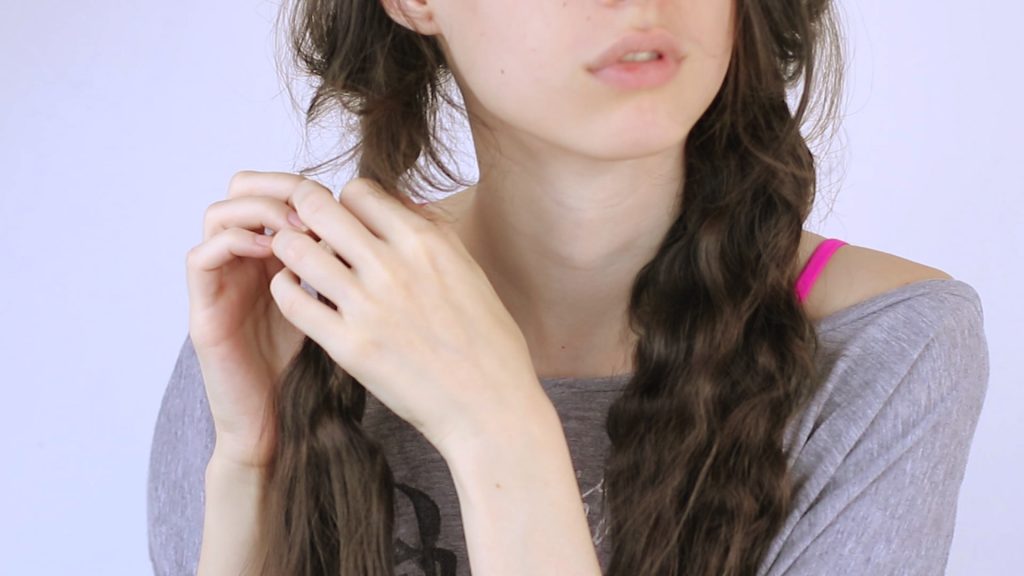
One of the simplest ways to get wavy hair at home without heat is by braiding your hair and leaving it for several hours or overnight. When you undo the braids, you’re left with textured waves. This method works for almost all hair types. Here’s how to do it:
- Start with Damp Hair: As mentioned, your hair should be damp but not soaking. You can wash your hair, let it air-dry partway, and then proceed when it’s just slightly damp. If you want, apply a bit of mousse or a curl-enhancing cream through your hair at this stage to help define the waves. A spritz of sea salt spray can also add texture for that beachy effect.
- Divide Hair and Braid: Decide how many braids to do based on how tight or loose you want the waves. For looser, beachy waves, do one or two braids; for tighter, crimped-style waves, do multiple smaller braids. For example, a single braid will give a gentle wave, while several braids will create more pronounced waves. Partition the hair accordingly. A popular choice is two braids (pigtail braids), one on each side of the head, as it gives even waves on both sides and is comfortable to sleep in. Braid each section tightly and secure the end with a hair elastic (use a soft elastic or scrunchie to avoid leaving a hard crease at the end). Make sure to braid as far down to the ends as possible for waves that travel through the full length of your hair.
- Optional – Braid Style Variations: You can experiment with different braid styles. A three-strand English braid (the regular braid) is easiest. If you know how to do a French braid or Dutch braid, you could braid from the scalp (starting near the crown and adding hair as you go down). French/Dutch braiding will give waves starting closer to the roots, which can be nice for adding volume on top. It’s a bit more work, but it can make the wave pattern more uniform from root to tip. If doing two braids, you might French braid each side of your head. If just one, you could do a single loose French braid down the back.
- Dry Completely: Leave the braids in until your hair is completely dry. For convenience, many people sleep overnight with the braids – this gives plenty of time for even thick hair to dry and set. Plus, you’ll wake up with wavy hair. If you’re short on time, you could blow-dry the braids on a low setting until dry, but that introduces a bit of heat (still far less than direct curling iron heat).
- Unbraid Gently: Once dry, carefully take out the hair ties and unravel the braids. Don’t brush the hair, as brushing will poof it out. Instead, use your fingers to separate and loosen the sections. Shake out your hair a little to let the waves settle.
- Polish the Look: The result should be a head of beautiful rippling waves. If the waves are a tad too uniform or you have sections clumping together, run your fingers through to break them up. You can also mix up the wave pattern by scrunching in a tiny bit of styling cream or serum. To prevent frizz, avoid handling the hair too much. Finally, mist a light-hold hairspray or apply some sea salt spray to set the waves. Salt spray can give a nice beachy, tousled finish – just scrunch it in lightly and let it dry.
Pro Tip: For visual help on braid waves, search for an “overnight braid waves” tutorial on YouTube – seeing someone braid and the results they get can be motivating. Additionally, websites like WikiHow have illustrated articles on braiding hair for waves. You’ll also find inspiration on Pinterest if you search “braid waves,” with many before-and-after photos. And remember, the number of braids makes a difference: more braids equal tighter, smaller waves, so feel free to experiment to find your perfect wave style.
Twist Buns Technique
Another fun heatless method to achieve waves is using twist buns. The idea is to twist sections of damp hair and coil them into buns (like little cinnamon buns on your head) and let them set. This method often creates more of a loose, spiral wave – and it can add a lot of volume. It’s also quite comfortable for sleeping if you position the buns well. Here’s how to do twist buns for wavy hair:
- Start Damp & Prep: Begin with damp hair and add a bit of leave-in conditioner or smoothing serum if your hair is prone to frizz (since twisting can sometimes cause frizz when undoing, a smoothing product helps). If your hair is straight and might not hold waves easily, work in a small amount of mousse or styling foam for hold.
- Section Your Hair: Split your hair into sections based on how many buns you want. Commonly, people do either two buns (one on each side of the head) or four buns (two on each side) for a more uniform wave. More buns will create more, tighter waves; fewer buns will yield looser waves. For beginners, try with two first (often called “space buns” placement).
- Twist and Coil: Take one section and twist the hair away from your face (direction matters because it will affect how the wave looks — away from face on both sides usually looks better). Keep twisting the same section until it naturally starts to coil onto itself. Then coil it into a bun shape flat against your head. Think of it like making a little snail shell or cinnamon roll with your hair. Secure the bun with a soft scrunchie or some bobby pins. Using a scrunchie is great for overnight as it’s gentle and won’t leave hard marks. Repeat on the other side (and additional sections if doing four). Try to make the buns roughly symmetrical in position so your wave pattern is even.
- Dry and Set: Leave the twist buns in for several hours, or sleep on it overnight. If you have trouble sleeping with buns, you can position them high on the head or low at the neck depending on if you’re a back or side sleeper. Silk scarves or bonnets can be wrapped over the buns to reduce friction overnight (and as a bonus, this keeps frizz away).
- Unravel the Buns: In the morning or after hair is dry, gently remove the scrunchies/pins. Do not just yank through the twist or you could tangle your hair. Instead, carefully unwind each bun and then let the twisted hair untwist. You’ll have long twisted ropes of hair – go ahead and use your fingers to separate these twists. This will open them up into soft waves. Shake them out gently.
- Finish the Waves: The twist bun method often results in bouncier waves with a bit of curl towards the ends. Use your fingers to arrange the waves. If the curls at the ends are too tight for your liking, you can lightly finger-comb them or even run a damp hand over them to relax them a touch. Usually, though, they will loosen on their own after a few minutes. Apply a light hairspray or some texturizing spray to set the style. Avoid brushing, as that can turn the waves into frizz.
Pro Tip: This method is very similar to a style some call the “Princess Leia buns” for overnight curls – it really works! If you search that term or “twist buns for heatless waves” on a beauty blog or YouTube, you’ll find plenty of visual examples. Seeing the size of sections others use and how tightly they twist can help you gauge what will work for your hair. Don’t be discouraged if the first attempt has some uneven waves; with a bit of trial, you’ll figure out the perfect number of buns and twisting tension for your desired wave.
Headband Curls
Headband curls are a popular heat-free wavy hair method that yields lovely, even waves. This technique uses a headband (or a similar fabric ring) as a base to wrap your hair around, effectively acting like a soft roller around your head. Many people love this method because it’s relatively comfortable to sleep in and gives a consistent wave pattern. Here’s how to do headband curls:
- Choose Your Headband: Use a stretchy fabric headband that fits snugly around the circumference of your head (across the forehead and around the back). It should be a bit elastic but not too tight to avoid discomfort. Alternatively, you can use a long strip of soft cloth or even the belt from a bathrobe – these can be wrapped around your head and tied if you don’t have a headband. Some companies sell special heatless curling rod headbands (like a foam rod with a silk cover) made for this purpose, but a regular headband works fine for DIY.
- Prep Damp Hair: As usual, start with slightly damp hair. You can part your hair as you normally do, or straight back – the way you wrap will cover it anyway. Applying a little styling mousse can help the wave hold better, especially for straight hair.
- Wrap Sections Around the Headband: Place the headband over the crown of your head (like a halo), with your hair underneath it. Starting with the front section of hair on one side, take a 1-2 inch section and lift it up, then tuck it over and under the headband, pulling it through. This will loop the hair around the headband. Add the next section of hair to the end of the first and repeat, working your way around: each time, grab the next free section of hair and incorporate it, looping it over the headband and pulling through. Essentially, you are continuously wrapping your hair around the headband. Work from the front towards the back on each side, until all your hair is wrapped around the headband. The hair will crisscross over the band, creating a wrapped roll. For very long hair, you might need to go around the headband multiple times with the lengths.
- Secure and Set: Once all hair is wrapped, you can secure the ends if needed with a few pins, but often tucking the last bits under the headband is enough to hold it. The wrapped hair should feel reasonably secure around your head. Now, let it set. This is definitely an overnight candidate – it’s fairly comfortable because you have a soft headband and the hair is evenly distributed around your head (you won’t be lying on lumps of hair). If you’re doing this in the daytime, give it at least a few hours to dry completely.
- Unwrap to Reveal Waves: To take it out, gently slide the headband off or unwind the hair in reverse. Be careful not to snag hairs. As you remove the headband, your hair will cascade down in loose curls/waves. Separate the curls with your fingers.
- Touch Up and Hold: The headband curl often gives a very smooth wave, starting near the crown and curling toward the ends. You might find the waves all blend together in a uniform flow. Use your fingers to break them up a bit for a more natural look. If there’s any section that didn’t dry fully (occasionally the hair near the very scalp might still be a tad damp), you can use a blow-dryer on a low setting for a minute just to set it, or just note for next time to start with drier hair. Set the style with a light hair spray or a mist of sea salt spray for a more casual, beachy finish.
Pro Tip: The headband method has been a social media favorite, so there are lots of video tutorials demonstrating it. Search for “headband curls tutorial” or even “robe belt curls” (a similar concept using a belt tie) to see how others do it. One great thing about videos is seeing how they section and wrap the hair around the band – after one watch, you’ll get the hang of the wrapping technique. If you prefer step-by-step pictures, check out beauty blogs like All Things Hair, which have guides on headband curls with photos. Once you master this, you’ll love how consistently wavy and polished the results can be without a drop of heat.
Other No-Heat Overnight Waves
The three methods above are among the most popular, but there are plenty of other creative heat-free wavy hair techniques you can try at home. Here are a few honorable mentions:
- Sock Curls or Rag Rolls: This is a DIY take on rollers. You take strips of fabric (old clean socks or cut-up T-shirt pieces work well) and use them to roll sections of damp hair. For example, you’d wrap the end of a section around the middle of a sock, roll it up toward the scalp, then tie the ends of the sock together to hold it. Sleep on it and the next day you’ll get waves or curls depending on the size of the sections. The texture can be similar to a roller set – bouncy waves if done with large sections.
- Pin Curls: An old-school technique where you coil small sections of hair into flat spirals and pin them to your head. This is more often used for retro-style waves or curls, but if you do larger pin curls, you can achieve loose waves. It’s a bit labor-intensive because you might have to do many pin curls, and it can be tricky to sleep on unless you have a cushioned wrap over them.
- Twist Braids: A variant on braiding – instead of three-strand braids, you twist two sections around each other (a rope braid) and secure the end. Doing two rope braids on damp hair can also yield a beautiful wave once you untwist them. This can sometimes produce a looser wave than a three-strand braid.
- Bantu Knots (Mini Buns): Similar to the twist bun concept but usually done in multiple small sections all over the head. You twist and wrap small sections into mini buns. This often is used by those with very curly hair to reshape curls, but on straight hair it could create very tight curly-waves (almost a perm-like look) depending on the size. Larger sections would need to be used for more wave and less curl.
- The T-Shirt Hair Halo: A creative method where you roll a T-shirt into a long rope, place it like a halo on your head (similar to the headband method), and then wrap hair around it. It’s basically a DIY headband curl. Many find this comfortable to sleep in as well.
With any of these alternative methods, the general principles remain: start slightly damp, secure the hair into the shape you want it to dry in, wait until completely dry, and then take it out and gently finger-comb to reveal waves. Feel free to experiment on a weekend or night when you’re not in a rush – you might discover a heatless technique that your hair particularly loves. Part of the fun is finding what creates the best waves for your hair. And remember, you can combine techniques: for instance, some people do a French braid on top and twist buns for the bottom sections, to get a mix of wave patterns!
(For visuals on these alternative methods, you can search platforms like YouTube or beauty blogs. There are many tutorials for “heatless overnight curls” that showcase a variety of tools from socks to leggings. Watching those can spark ideas on what household item you might use as a curler. The key is to be creative and find a comfortable way to set your hair.)
Product-Assisted Methods
Sometimes, you don’t need elaborate braiding or hot tools at all – a few product-assisted techniques can enhance your natural texture and create soft waves. These methods are especially useful for those who have some natural wave or curl in their hair, but they can also help give some wave to straight hair with the right tricks. Here we’ll discuss using mousse, sea salt spray, and other texturizing products to get wavy hair. These can be used on their own or in combination with the above methods to boost results. For example, you might braid your hair and use a salt spray to really amp up the beachy texture.
Using Mousse for Waves (Scrunching Method)
Mousse is a foamy styling product that can encourage wave and curl formation, particularly when combined with a scrunching technique. It’s great for creating that casual, tousled wave look without any heat. Here’s how to use mousse to achieve wavy hair:
- Start on Wet Hair: Right after a shower, gently towel-dry or blot your hair so it’s not dripping but still wet. Mousse spreads best on wet hair. If your hair is dry, you can wet it and then towel-dry to mimic this starting point.
- Apply a Generous Amount of Mousse: Shake your mousse can and dispense an egg-sized dollop of foam (for longer hair, you might need a bit more). Spread the mousse between your hands and then scrunch it into your hair. “Scrunching” means you gather sections of hair in your palms and push the hair upward toward your scalp, like accordion folding the hair. Do this all around, applying mousse primarily from mid-length to ends and whatever is left onto the roots. Make sure the product is evenly distributed. The mousse will help hair hold the shape it dries in.
- Scrunch and Squeeze: After applying, continue scrunching your hair with your hands. You can flip your head upside down to get more volume as you scrunch. The goal is to encourage your hair’s natural wave or curl pattern to clump and form. If your hair is naturally very straight, you might start seeing a slight wave or bend from this motion – and if your hair has even a hint of wave, this will bring it out.
- Optional Plopping: For those with wavy or curly tendencies, a technique called plopping can enhance the waves. This involves laying a cotton T-shirt on a flat surface, flipping your moussed, scrunched hair onto it, and then tying the shirt around your head to hold the hair scrunched up at the top of your head. You leave it for 10-20 minutes (or even longer) and then let it out to air-dry. This can set a nice wave pattern without frizz. It’s optional, but a fun trick if you have time.
- Air Dry or Diffuse: Allow your hair to air dry while occasionally giving it a scrunch as it dries. Avoid touching it too much beyond that, as over-handling can cause frizz. If you want to speed things up or add volume, use a diffuser attachment on your hair dryer. A diffuser spreads the airflow so you can dry your hair without blowing out the waves. Cup sections of hair with the diffuser and dry on low heat/speed. Drying with a diffuser while scrunching can really help lock in waves on hair that doesn’t wave easily.
- Finish and Tweak: Once completely dry, you should see a head full of loose waves or curls, depending on your hair’s natural texture. You might have a bit of “crunch” from the mousse – that’s the cast of the product. Simply scrunch your hair again with your hands (you can put a tiny bit of hair oil on your palms if you like) to “break the cast.” This will make the hair soft but the shape will remain. Finally, you can use a touch of hairspray if you feel the waves won’t hold, but many mousses provide enough hold on their own. The result is natural, beachy waves that feel soft.
This method works especially well for those with some natural wave. If your hair is very straight, you might get only a subtle wave – in that case, using mousse in conjunction with braiding or twisting (scrunch in mousse then braid, for example) can yield a much more defined result.
(For a visual example of the mousse-and-scrunch method, you could search YouTube for “scrunching hair with mousse” to see the technique in action. Often hair product brands also have demonstration videos on their websites for using their mousse to create waves.)
Using Sea Salt Spray
Sea salt spray is a fantastic product for achieving beachy waves. It’s essentially a spray that contains salt and other ingredients to mimic the effect of ocean water on hair – that slightly gritty, tousled texture you get after a swim in the sea. Salt sprays are popular because they create natural-looking waves and texture with minimal effort. Here’s how to use salt spray for wavy hair:
- Damp or Dry Hair: Salt spray can be used on damp hair or dry hair. For forming waves from scratch, it’s often best on damp hair. If your hair is clean, you can let it air-dry a bit after washing, or just mist it with water to get it damp.
- Spray Evenly: Hold the bottle about 6-8 inches away and spritz the salt spray onto your hair, focusing on the mid-lengths and ends (which is where you want that texture). Don’t over-saturate; start with a few sprays on each side and scrunch with your hand, then add more if needed. Some people also lift sections and spritz lightly at the roots to get a bit of lift and grit at the crown.
- Scrunch and Tousle: Use your hands to scrunch and scrunch (similar to the mousse method) to encourage waves. You can also twist sections of hair with your fingers, then release, to form piecey waves. Another trick: create a few loose twists or buns after spraying, and let your hair dry like that for stronger waves. Because of the salt, as the hair dries, it will stiffen a bit in the shape it’s in – so scrunching or twisting while drying helps imprint a wave.
- Air Dry: Let your hair air dry after applying the salt spray. As it dries, you’ll notice more of that rough beach texture appearing. Avoid combing or brushing, as that will disrupt the texturing effect. If in a hurry, you can lightly diffuse dry with a hair dryer while scrunching.
- Final Look: Once dry, you’ll have a tousled, matte finish wavy look, as if you just came from a day at the beach. Salt spray often leaves the hair with a bit of a dry, gritty feel (that’s normal – it’s the salt). If it feels a tad too dry or frizzy, you can scrunch in a tiny drop of hair oil or serum to tame it without losing the texture. The waves from salt spray are generally loose and very natural-looking, great for an everyday casual style.
Keep in mind, some salt sprays can be a bit drying (salt removes moisture), so it’s good not to overuse them or to combine them with a hydrating product if your hair is dry. There are also salt-free wave sprays on the market that use alternatives to salt for those who find salt too harsh; the application would be the same for those.
(For inspiration, look at some product websites or beauty magazines. Many will show models or real users with before-and-after using a salt spray, so you can see the effect. You might search for “beach waves with salt spray” in Google Images or YouTube to find quick demonstrations. The key is the scrunching motion while it dries.)
Using Texturizing Sprays or Creams
Beyond mousse and salt spray, there’s a whole range of texturizing products that can assist in creating waves. These include things like wave sprays (some are salt-based, others are not), texturizing creams or lotions, and dry texturizing sprays (often used on dry hair for volume and grit). These products typically won’t create waves out of nowhere on totally straight hair, but they enhance and hold waves you create and give that cool, tousled finish. Here’s how you might use them:
- Texturizing Wave Spray (Salt-Free): Some sprays are designed to create beach waves without using salt (they might use sugars or other texturizers). You can use these similarly to a sea salt spray. Apply to damp hair, then use a heat-free method (braid, bun, or even just scrunch) and let dry. The product will encourage the wave and often add some softness or shine (since they sometimes include conditioners to counteract dryness). They are great if you want a bit of wave with a softer feel than salt spray provides.
- Curl-Enhancing Creams: These are creamy products meant to define curls or waves and fight frizz. If your hair has a slight wave, you can apply a curl cream to damp hair, scrunch, and air dry to get a more defined wave with less fluff. They won’t usually make straight hair wavy, but on the right hair they work wonders for smooth, languid waves. Use a small amount (dime or quarter-sized) on damp hair, distribute evenly (you can comb it through), then scrunch and dry as you would with mousse. The result is often very soft, touchable waves.
- Texturizing Powder: This is a product mostly used to add volume at the roots, but it also makes hair a bit rougher (in a good way) so it’s more moldable. If you styled waves and they’re looking too limp, you can sprinkle a little texturizing powder at the crown and fluff your hair with your fingers. It can give that messy-sexy texture especially on the top of your waves.
- Dry Texturizing Spray: Think of this as a hybrid between hairspray and dry shampoo. It’s sprayed on dry, styled hair to add grit and volume. After you’ve created waves (by any method), you can lift sections and spray a texturizing spray underneath, then scrunch. It will make your waves look more lived-in and piecey. A few spritzes can also revive waves on the second day by giving them some oomph.
When using these products, always start with a small amount – you can layer more if needed. The goal is to avoid weighing the hair down or making it sticky. They should enhance the wave, add hold and texture, but still keep the hair looking and feeling nice. For instance, a popular tip is to finish a wavy hairstyle with a light mist of a texture spray instead of a heavy hair spray, for a more touchable result.
(Pro Tip: Check out beauty editors’ product roundups for waves. Magazines like Allure or Cosmopolitan often list the best wave-enhancing products and how to use them. These can guide you on reliable products to try. Also, if you see someone with envy-worthy waves in a tutorial or Instagram post, they often mention the products they used – those can be good clues on what might work for your routine.)
Now that we’ve gone through the methods, let’s talk about how to make those gorgeous waves last and look great all day (or even multiple days).
Hair Care Tips for Long-Lasting Waves
Achieving the perfect waves is only half the battle – you also want them to last as long as possible and stay looking fabulous. Here are some hair care tips to make your wavy hair last, prevent frizz, and keep your locks healthy and shiny:
- Let Waves Cool and Set: One of the golden rules after using any heat tool (curling iron, flat iron, hot rollers) is to let the hair cool in the curled shape before you manipulate it. The wave/curl forms when the hair heats up and then “sets” as it cools down. If you try to brush or style the wave while it’s still warm, you’ll likely pull it out. So after curling, pin up curls or just leave them untouched until they’re room temperature. This will make the waves last much longer.
- Use the Right Hold Product: For waves that need to last all day or into the night, using a product for hold is important. After styling, mist a flexible hold hairspray throughout your hair. Flexible sprays are great because they hold shape without making the hair overly stiff or sticky. If you have hair that doesn’t hold curl well, you might use a stronger hold spray, but apply lightly in layers rather than a heavy shellac. You can also use a lightweight gel or mousse before styling for added hold (for example, a bit of mousse before blow-drying and curling can give the curls something to cling to). The key is to choose a product that matches your hair’s needs: fine hair does well with lighter sprays and volumizing products, whereas thicker hair may need a bit stronger hold or more product.
- Avoid High Humidity or Moisture: Water is the enemy of styled waves. If the weather is humid, consider using an anti-frizz serum or cream after styling to seal the hair and repel moisture. A tiny amount of silicone-based serum smoothed over the waves can help prevent the humid air from swelling the hair and causing frizz or droop. Additionally, if you know you’ll be in a humid environment, opting for a stronger hold or a tighter wave initially can help, since it might relax with exposure to moisture. Always carry an umbrella or hood if there’s a chance of rain – even a few drizzles can undo your waves if you’re not careful.
- Hands Off!: We often tend to touch our hair throughout the day, but if you want waves to last, avoid excessive touching, brushing or running your fingers through your hair. The more you finger-comb, the more you’ll break up the definition and encourage the waves to flatten out. Once you’ve achieved the style, try to just let it be. If you need to neaten it up, gently use a wide-tooth comb or just re-scrunch any sections that have loosened.
- Preventing Frizz: Frizz can be a concern, especially if you’ve used heat-free methods or if you have naturally wavy/curly hair. To keep frizz at bay, ensure you hydrate your hair well during your wash (use conditioner or a hair mask regularly). When styling, products like smoothing creams, serums, or even just a bit of argan oil on the ends can help keep the wave pattern smooth. Also, never brush dry wavy hair with a fine brush – it’s a recipe for frizz. Use a wide-tooth comb or just fingers. If you see frizzy bits during the day, you can apply a very small dab of serum on your fingertips and twirl it around any frizzy curl to redefine it.
- Make Waves Last Overnight: If you want to preserve your style for the next day, take care of your hair overnight. Sleeping on a silk or satin pillowcase can make a huge difference. These fabrics cause less friction than cotton, so you won’t rough up the hair cuticle as you sleep, meaning you’ll wake with smoother hair. Another trick is to gently clip up your waves at the crown of your head (a very loose pineapple ponytail or a few big loops pinned) before bed. This keeps you from crushing your waves while you sleep. You can also loosely braid or twist your waves before bed – one very loose braid, for example – and then undo in the morning, and they will fall back into a nice bend. In the morning, use a bit of dry shampoo at the roots if needed to refresh and add volume, and a light mist of water or wave spray on the lengths to reshape any flattened pieces.
- Use a Curl Refresher: These days, there are spray products specifically labeled as “curl refresh” sprays or mists. They usually contain a mix of light conditioners and style enhancers. Spraying this on day-old waves can revive their bounce. You can DIY a refresher by mixing a bit of leave-in conditioner with water in a spray bottle and spritzing it on your hair, then scrunching to rejuvenate the wave.
- Regular Hair Care: Long-lasting style also comes from healthy hair. Trim your hair regularly to remove split ends (damaged ends won’t hold style well and tend to frizz out). Keep your hair moisturized with conditioning treatments because healthy, hydrated hair reflects shine and holds shape better. If you frequently style with heat, consider doing a deep conditioning mask once a week to restore moisture. Also, clarify your hair occasionally (once a month) if you use a lot of product, as buildup can weigh hair down and make it harder to style.
By following these tips, your waves should stay looking defined and lovely well after you’ve styled them. With a bit of care, you can even enjoy your wavy hairstyle for a couple of days. Next, let’s go over some common pitfalls – knowing what not to do is just as important when you’re trying to master how to get wavy hair at home.
Common Mistakes to Avoid
When experimenting with how to get wavy hair at home, it’s easy to make a few missteps. Here are some common mistakes and what not to do when trying to achieve wavy hair, along with how to fix or avoid them:
- Using Too Much Heat: Cranking your curling iron or flat iron to its highest setting might make waves faster, but it can also damage your hair and even cause your curls to drop out faster (paradoxically, overcooked hair won’t hold shape well). Avoid using a heat setting that’s too high for your hair type. Fine or damaged hair generally doesn’t need more than ~300°F, and thicker hair can go 350-400°F range safely. Always use a heat protectant spray before applying heat. Never use a hot tool on wet or even damp hair, as that can literally boil the moisture in your hair and lead to breakage – hair should be thoroughly dry before curling or flat ironing.
- Skipping Heat Protectant: This mistake goes hand-in-hand with the above. If you are using heat, never skip the heat protectant. It might seem like an unnecessary step, but it significantly reduces damage and your hair will thank you. Heat protectants also often have a slight holding property which can even help your waves last longer. Make it a rule: no iron touches your hair without a protectant on it.
- Not Allowing Hair to Dry in No-Heat Methods: When doing braids, buns, or any overnight set, if your hair is even slightly damp when you take it out, the wave will likely fall out quickly or turn frizzy. One common mistake is making hair too wet when setting. Remember, damp means mostly dry. Sopping wet hair braided at 10 pm will probably still be wet at 7 am, and the waves won’t have formed properly. Either give your hair some air drying time before you braid, or use a blow dryer on cool for a few minutes before undoing the style to ensure everything is dry. If you undo a braid/bun and feel moisture, put it back and dry a bit more.
- Overloading on Product: While some product is good for hold, too much can backfire. Using a heavy hand with mousse, gel, or spray can weigh hair down, making waves limp or crunchy. It can also make hair look greasy or feel sticky. Follow the principle of “less is more” to start – you can always add a bit more if needed. For instance, spray hairspray in a light veil over hair rather than spraying one section until it’s wet. If you accidentally applied too much, a quick fix is to blast your hair with a hair dryer on medium heat for a few seconds – this can dry and redistribute product build-up (especially for hairspray or mousse) and give back some movement.
- Brushing Out Waves (at the wrong time): Brushing your hair after creating waves – especially with a fine or dense brush – can turn your lovely waves into a frizzy puff. For most wavy styles, you want to either use your fingers or a wide-tooth comb to gently loosen curls. If you must brush, do it before styling (to detangle pre-curl) or once the waves are set and you specifically want a very soft, brushed-out look. For example, brushing is used for retro Hollywood waves to merge them into one smooth wave, but that’s a specific style. Generally, to maintain definition, skip the brush. If you wake up with tangled waves, instead of brushing from the roots down (which will disrupt the wave pattern), try just finger-combing or brushing only the top smooth part and finger-combing the rest.
- Not Sectioning the Hair: As mentioned earlier, not dividing your hair into sections when curling or waving can lead to missed pieces or uneven waves. If you randomly grab pieces to curl, you might end up with some straight bits left or inconsistent curl directions that don’t blend well. Always section your hair – it ensures you cover everything. Clip away sections you’re not working on. It might take a bit more time, but the result will be much more polished. Plus, working in sections helps if your arms get tired; you can take a break between sections.
- Expecting One Method to Work for Everyone: This is more of a mindset mistake. Don’t be discouraged if a technique that worked for your friend doesn’t come out perfect on you. Maybe her hair is thicker, or shorter, or more naturally wavy. For example, the scrunching with mousse method might give your friend perfect waves but only slight texture for you – that’s okay. You might need to add braids into the routine, or use a different product. Avoid a one-size-fits-all approach. Sometimes a bit of experimentation is needed to find what yields the best waves for your unique hair. That’s why we encourage trying different methods or combinations until you’re satisfied.
- Tight Elastics and Rough Handling: When doing overnight methods, using regular thin rubber bands to tie braids or buns can create a crease in the hair or cause breakage. Use fabric-covered elastics or scrunchies, and not too tight – just enough to hold. Similarly, ripping through a braid or pulling out rollers roughly is a mistake; always gently unravel to keep the wave intact and hair healthy. Patience pays off here.
- Not Using Product at All: On the flip side of product overload, using nothing can also be a mistake if your hair typically doesn’t hold shape. Clean, product-free hair can be too silky and soft, meaning waves might slide out quickly. Even just a light mousse or a texture spray can provide the grit needed to hold a curl. So if you find your waves falling flat within an hour, next time prep with a styling product or finish with a bit more hairspray.
By being mindful of these common mistakes, you can troubleshoot why a wave technique might not have worked and adjust for next time. Now you’re equipped with knowledge of both do’s and don’ts in your wavy hair journey.
Conclusion
Wavy hair is a beautiful, sought-after style for its effortless and romantic look – and as we’ve explored, there are many ways to achieve it right at home. From heat-based techniques with curling irons and flat irons to heat-free wavy hair methods like braids, buns, and headband curls, you have a full toolkit of options to try. We’ve also learned how important it is to consider your hair type when choosing a method, and how a bit of product can go a long way in helping you achieve waves at home that last.
Remember that getting the perfect wave may take a little practice. Don’t be afraid to experiment with different techniques or even combine them – for instance, you might find that a quick once-over with a flat iron plus an overnight braid gives you the best results for your hair. Hair styling is as much about the journey as the destination, so have fun with it! If one method doesn’t give you the exact waves you want, try another until you find your signature approach.
To visualize these methods and get further inspiration, you can explore resources online. Beauty blogs and magazines often have photo tutorials (sites like Allure, Cosmopolitan, or Byrdie regularly publish how-to articles on wavy hairstyles). Stock photo sites such as Unsplash or Pexels can provide images of the finished wavy looks – just search for terms like “beach waves hair” or “wavy hair tutorial” to see examples. And of course, YouTube is a goldmine of tutorials: watching someone do a French braid wave or use a flat iron for S-waves can be incredibly helpful if you’re a visual learner. Don’t hesitate to look up a “How to get wavy hair” video to see these tips in action.
In summary, the best practices for how to get wavy hair at home include understanding your hair’s needs, following the step-by-step methods that suit you, using the right products wisely, and avoiding common mistakes that could sabotage your efforts. With the guidance provided, you’re well on your way to creating gorgeous waves that look professional, yet were done by you in your own space. So go ahead – try out these techniques, find the ones you love most, and enjoy the head-turning, confidence-boosting effect of rocking those lovely waves!


