7 Secrets On How to Make A Synthetic Wig Look Real Instantly

Synthetic wigs are a wonderful, affordable way to change up your hairstyle, but nothing gives it away faster than an unnatural-looking wig. From overly shiny synthetic fibers to a hairline that’s too perfect, a synthetic wig can sometimes scream “wig” if not handled properly. The most common culprits for a fake-looking wig are excessive shine, unnaturally thick hairlines, visible lace, and a poor fit.
Why does this happen? Unlike human hair wigs, which have a soft, realistic sheen and irregular density, synthetic wigs are made of artificial fibers (essentially fine plastics) that often have a tell-tale gloss. A cheap $30 synthetic wig, for example, won’t look as authentic as a high-quality human hair wig right out of the box. But don’t worry – making a wig look natural is absolutely possible with a few tricks. In fact, with the right tweaks, you can transform even a budget-friendly synthetic piece into a realistic style in minutes.
In this article, we’ll reveal 7 secrets on how to make a synthetic wig look real instantly. These are simple, effective wig transformation hacks – from hairline tweaks to styling tips – that will elevate your wig game on the spot. By following this step-by-step guidance, you’ll be able to wear your wig with confidence, knowing it looks just like natural hair. Let’s get started!
Understanding Synthetic Wigs

Before diving into the how-tos, it’s important to understand what makes synthetic wigs different. Synthetic wigs are typically made from man-made fibers (like Kanekalon or toyokalon) designed to mimic real hair. They come pre-styled in various colors and cuts, which is great for convenience. However, the texture and shine of synthetic fibers differ from human hair. Synthetic strands tend to have a uniform thickness and plastic-like shine that can appear unnaturally glossy under light. Human hair wigs, on the other hand, have cuticles that reflect light more softly and move more fluidly.
Not all synthetic wigs are equal in quality, though. Higher-end synthetic wigs use advanced fibers that look and feel more realistic. For example, some brands offer “vegan fiber” or heat-friendly synthetic wigs that have a more authentic appearance. These can mimic the texture of human hair better and are often less shiny. Lace front synthetic wigs (which have a sheer lace base at the hairline) also provide a more natural look, as individual fibers are hand-tied into the lace, creating the illusion of hair growing from your scalp. In contrast, standard machine-wefted wigs might have a thicker, less natural hairline.
There are a few types of synthetic wigs you might encounter:
- Basic cap wigs – Machine-made with closed lace or open wefts; often have a teasing (permatease) at the crown that can look a bit bulky.
- Lace front wigs – Feature a lace section at the front for a more natural hairline. The rest may be machine-wefted. These allow you to style hair off the face more realistically.
- Full lace or 360° lace wigs – Entire cap (or around the perimeter) is lace, allowing for maximum styling flexibility (ponytails, etc.) and a very natural look, but these are pricier.
- Heat-resistant synthetic wigs – Made of fibers that can withstand low to medium heat. This means you can use curling irons or flat irons (on a low setting) to restyle them. Regular synthetic wigs cannot handle heat and will melt or frizz if exposed to hot styling tools.
Understanding your wig type and fiber is important because it guides how you can style it. For instance, if your wig is not heat-friendly, you’ll avoid direct heat (or use alternative methods like steam). If it has a lace front, you’ll know you can customize the hairline. Keep in mind that even the best synthetic wig may need a bit of personalization to look ultra-realistic. The good news: the fixes are usually quick and easy. Now, let’s dive into the seven secrets that will instantly make your synthetic wig look more real.
Secret #1: Plucking the Hairline
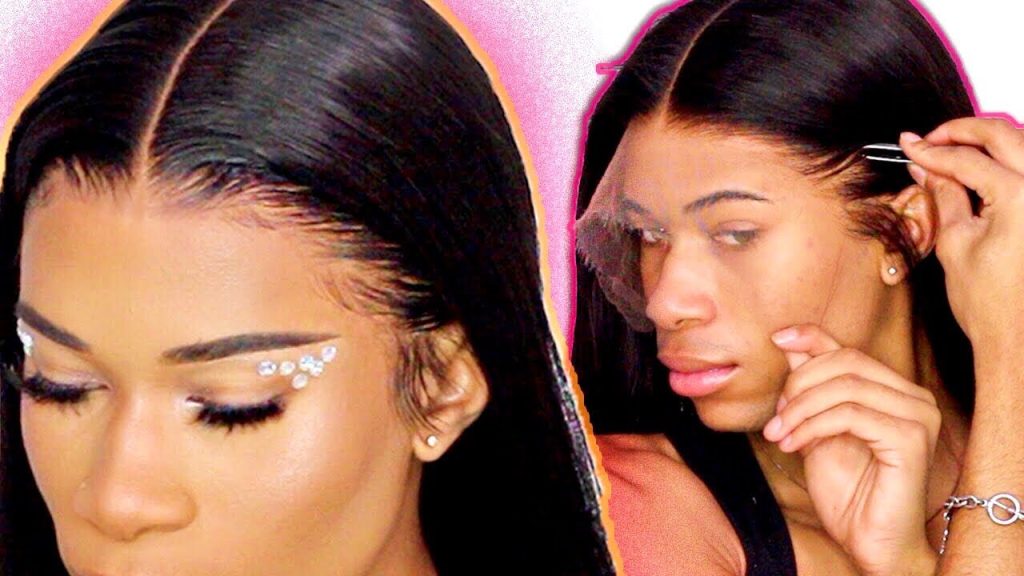
Create a softer, more natural hairline by plucking excess hairs. Most synthetic wigs (even lace fronts) come with hairlines that are too dense or perfectly uniform. In reality, natural hairlines are a bit uneven and have less hair at the very edge. By plucking the hairline, you mimic this effect, making the wig look like the hair is coming right out of your scalp.
How to do it: Place your wig on a wig stand or secure it on your head using clips. Using a good pair of tweezers, gently tweeze out a few hairs at a time along the front hairline, especially around the forehead and temples. Focus on areas that look overly thick or straight-lined. The goal is to create a gradual, irregular transition from the forehead to the wig hair – slightly sparser at the very edge, then building to full density. This unevenness is key to a realistic look.
Take your time with this process: pluck a little, then step back and assess. Make sure to move around to different spots frequently, rather than over-plucking one area (which can create a bald patch). You might pluck more around the temples and slightly less at the center, depending on your natural hairline shape. If your wig has a lace front, be extra careful not to tear the lace – hold the hair taut and tweeze softly.
Many lace front wigs are advertised as “pre-plucked,” meaning the manufacturer already thinned the hairline for you. Even so, you can usually benefit from a bit more plucking to suit your own face. If your wig came with baby hairs (those tiny hairs along the hairline), you can keep them or trim them shorter. In fact, creating a few baby hairs of your own is a great trick: trim a few short wispy strands at the front to help blur the line between the wig and your forehead. A natural hairline often has these delicate hairs, and adding them to your wig can hide the edge of the lace and add to the realism.
For visual guidance, check out YouTube tutorials on plucking a wig hairline – many wig experts and beauty vloggers show step-by-step how to do this. You’ll find that before-and-after images in these tutorials really highlight how much more natural a wig looks once the hairline density is broken up. Even a quick search for “synthetic wig hairline plucking tutorial” will pull up useful videos. Some beauty blogs also have photos of wigs pre- and post-plucking, so you can see the difference in realism. This small customization can instantly take your wig from “wiggy” to wow, that looks like real hair!.
Secret #2: Using a Tinted Lace Spray or Makeup

Blend the wig’s lace with your skin tone for a seamless look. If you have a lace front or lace part wig, the sheer lace area where hairs are attached is meant to mimic a scalp. But if that lace is a different color than your skin, or if the knots (where hair is tied to the lace) are visible, it can be a dead giveaway. The fix is to tint the lace to match your complexion, either using a store-bought lace tint spray or regular makeup (foundation/concealer).
A lace tint spray is a specially formulated pigment spray for wigs. You simply spritz it on the underside of the lace, and it deposits color to help the lace disappear against your skin. These sprays come in various shades (light, medium, dark, etc.). Choose one close to your skin tone and apply a light layer to the lace, let it dry, and voila – the lace will blend much better with your scalp when you put the wig on. As one wig brand describes, these tinted sprays are “pigmented and buildable, designed to match your skin tone and make the lace disappear.” In other words, your wig will look like it’s growing right out of your head, no obvious lace line in sight.
If you don’t have a lace tint product, regular makeup can do the trick. Use a liquid foundation or concealer that matches your skin (or a shade lighter) and dab it onto the lace from the underside. You can use a small brush or sponge to work the makeup into the lace, especially around the part and the front hairline This fills in the tiny grid of the lace with color that mimics your scalp. Many wig wearers will put the wig on first, then gently brush some pressed powder or dab concealer on the visible lace areas (like along the part) to blend it. Be sure to blend evenly so there are no makeup clumps. The result should be that the lace front is virtually undetectable against your forehead.
Another quick hack: if you notice tiny black dots on your lace (the knotted hair), a bit of concealer or even a colored powder dabbed on those can help hide them. Some people choose to bleach the knots on their lace wigs for a permanent fix, but using tint spray or makeup is a much faster, safer alternative for beginners.
By tinting the lace or applying makeup, you eliminate that tell-tale line where the wig starts. For example, many wig specialists show before-and-after photos where an untinted lace looks like a light mesh on the forehead, but after using lace tint or foundation, it truly “melts” into the skin. You can find such images on wig company blogs (like Milano Wigs or Luvme Hair’s tutorials) and beauty blogs. Even stock photo sites or Pinterest might have comparisons of lace fronts with and without tint. Seeing those examples will convince you how crucial blending the lace is for a natural look.
Secret #3: Reducing the Shine
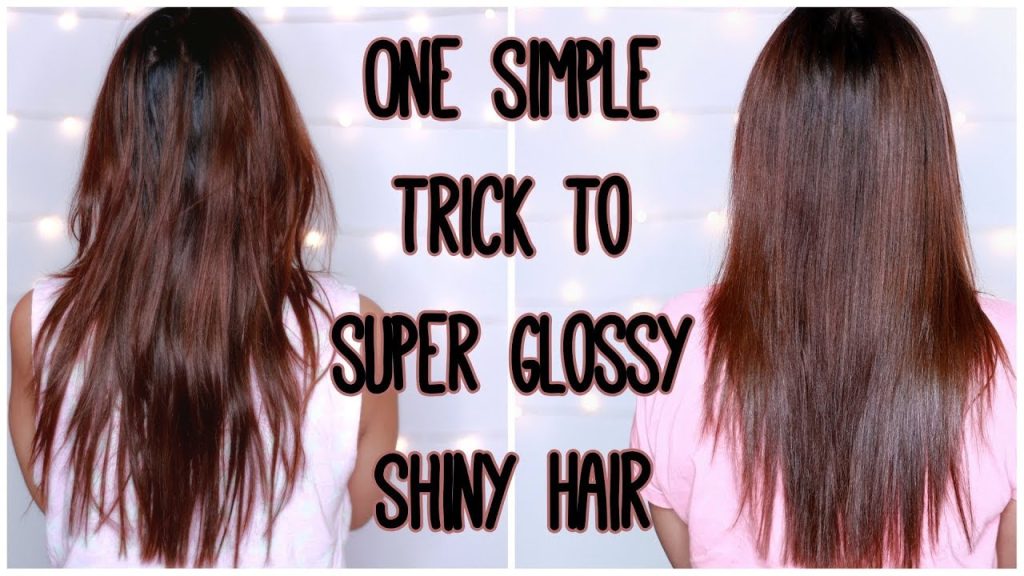
Dull the excessive shine of synthetic fibers for a more natural appearance. One of the biggest giveaways of a synthetic wig is the unnatural shine. New synthetic wigs, in particular, can be very glossy (especially under flash photography or bright sunlight). Human hair can be shiny when healthy, but synthetic fiber shine is different – it’s often described as a plastic or doll-like sheen. Luckily, there’s an instant cure: dry shampoo or powder.
Dry shampoo is a spray (or powder) product meant to soak up oils in hair, but wig-wearers use it as a matteifying agent. Simply take your wig (on a stand or held out) and lightly spray some dry shampoo over it, focusing on the top and lengths where you see the most shine. Hold the can a bit away (8-12 inches) so it disperses evenly. If you don’t have dry shampoo, you can use a little bit of baby powder or talcum powder instead – sprinkle a tiny amount onto your palms and pat it onto the wig. After applying, gently rub or shake the wig so the product distributes and any excess falls out. You’ll notice the high gloss dulls down to a soft, realistic luster.
Less is more here. You can always add another light dusting if it’s still too shiny, but start with a small amount – you don’t want to make the wig completely matte or leave visible powder. The goal is to take the plastic sheen down a notch so the hair looks more like natural hair that maybe has a bit of dry texture. This trick works instantly and can make a cheap, glossy costume wig look much more believable in seconds. As one expert puts it, synthetic wigs with too much shine appear fake, but a quick application of dry shampoo or powder instantly minimizes the shine while keeping the wig from looking too dull.
Another method some use is a fabric softener soak (since fabric softener can deposit a coating that reduces shine). However, that involves washing and drying the wig, which isn’t as “instant.” For a quick fix, stick to the dry shampoo approach.
If you’re curious how effective this is, try searching for before-and-after pictures of “synthetic wig too shiny” – you’ll likely find images on wig forums or blogs where someone applied powder to one side of a wig and left the other side shiny. The difference is striking. Many beauty bloggers also demonstrate this trick in posts or videos about making wigs look natural. It’s a must-do if your wig is looking a little too glossy. After all, a more matte finish means the wig hair will photograph more like real hair and less like a wig.
(Pro tip: If your wig still has a slight shine after dry shampoo, wearing it out in natural air for a day or two can also help. Over time, a bit of dust and air will naturally dull the fiber’s factory shine. But dry shampoo does the job immediately when you need it.)
Secret #4: Styling with Heat (If Safe)
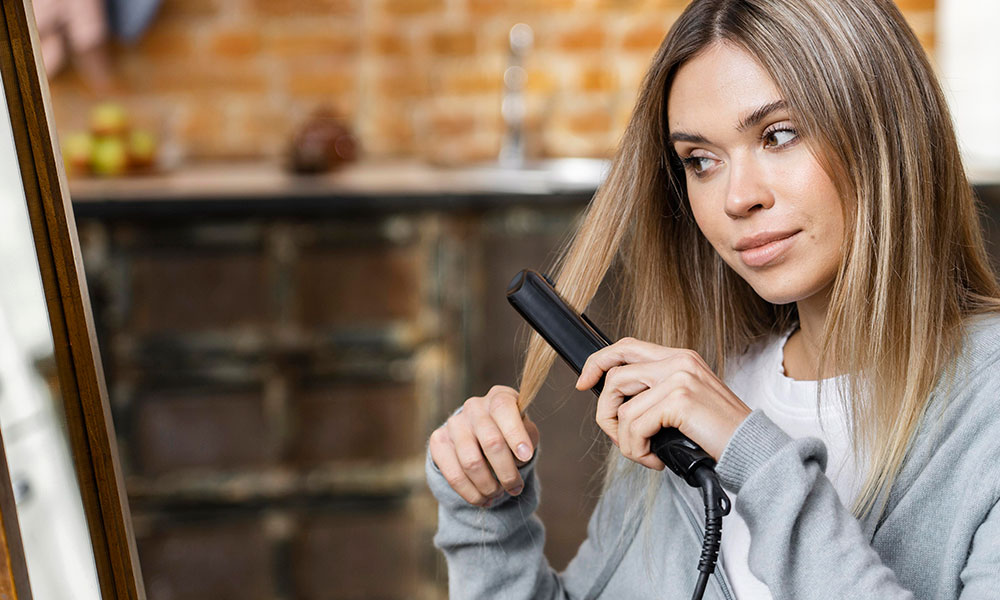
Use low heat styling (carefully) to adjust the wig’s texture or shape for a more natural look – only if your wig is heat-friendly! Real human hair changes style with heat – we curl, straighten, blow-dry our natural hair. Synthetic hair, however, holds the style it was manufactured with (whether that’s stick-straight, curly, etc.), and can sometimes have an unnaturally perfect shape or stubborn bumps from packaging. Styling your synthetic wig can make it look more realistic by adding natural-looking bends or volume, but you must approach heat cautiously.
Check the wig’s label or description to see if it’s heat-resistant or heat-friendly. If it is, it will usually indicate a maximum temperature (for example, “safe up to 270°F” or “use low heat only”). If you’re not sure, err on the side of very low heat. Never use high heat on a regular synthetic wig – it will melt or singe the fibers in an instant (imagine a hot curling iron on plastic – it’s the same effect, often described as being like using a blowtorch on a marshmallow!). So, assume low heat only, and test a small hidden section first.
For heat-friendly synthetic wigs: you can use tools like a flat iron, curling iron, or hot rollers on the lowest setting. A good strategy is to set your tool to a low temperature (around 250°F if possible) and see how the fibers respond. “Some synthetic wigs can tolerate low to medium heat, while others may get damaged. The wig’s label should specify this,” notes wig expert Kate Ross. Always start with a test curl or pass of the flat iron on an underside piece of hair. If it goes smoothly and the fiber doesn’t frizzle up, proceed slowly and do not exceed the recommended heat. For example, you might use a flat iron to gently straighten a few overly shiny or kinky areas, or use a curling iron to put a slight wave or bend in the ends for movement. Remember, you’re not trying to do a full restyle, just little tweaks for realism. Often just flattening the top of the wig can work wonders (synthetic wigs can have an unrealistic bump or volume at the crown from packaging). Placing the wig on a stand and running a flat iron briefly over the top can tame that bump.
For non-heat-safe wigs: stick to heat-free styling methods. One popular method is using steam. You can use a handheld clothing steamer or the steam from boiling water (very carefully) to gently heat and reshape the fibers. For instance, to change the part or tame a cowlick, people often put the wig on a stand, hold it in the desired position, and steam the area so the fibers soften and then cool in the new position. Another heat-free trick is rollers and hot water: set the dry hair in rollers and then pour very hot (near-boiling) water over the wig, then let it air dry – the curls will set to the rollers’ shape. These methods take a bit longer but avoid direct heat on the fibers.
No matter which method, be cautious with products. Regular hair sprays, mousses, or gels are not ideal for synthetic wigs (they can build up and even degrade the fibers). Instead, if you need hold or de-frizzing, use products made for synthetic wigs. There are light wig sprays that add hold or shine without damaging the wig. And if you do use any styling product, make sure to wash it out periodically (see Bonus Tips on care).
By adding a bit of personalized styling, you break that “just came out of the package” look. For example, flipping the ends out with a low-heat curling iron or scrunching a heat-safe wig into beachy waves can make it look more like how you’d style your own hair. Many YouTube tutorials on how to style a synthetic wig showcase gentle techniques like these. Watching those, you’ll see that a little wave or texture here and there gives the wig more life and realism. Just always remember: heat with caution – when in doubt, go without (and use steam or simply wear the wig a few times to let it relax).
Secret #5: Tweaking the Parting
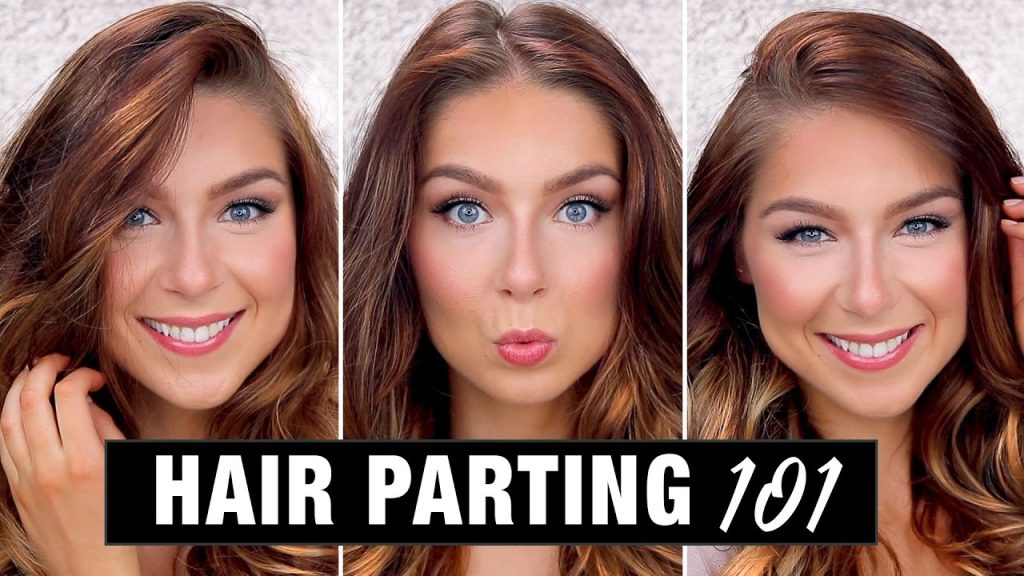
Redefine the part on your wig for a more realistic “scalp” appearance. The part line on a wig is another area that can either make it look natural or scream fake. Often, wig parts are too narrow, too straight, or unnaturally perfect. In contrast, a natural hair part will show a bit of scalp and isn’t always razor-straight. Tweaking your wig’s part can involve a couple of steps: plucking the part line, shifting the part, and concealing the part with makeup.
If your wig has a fixed part (common in lace part wigs or some lace fronts), you can widen it slightly by plucking just as you did with the hairline. Place the wig on a stand, and use tweezers to remove a few hairs along the part line, especially if the part is a thin, hard line. By creating a slightly wider part, you simulate the look of your scalp showing through. Be careful not to over-pluck – a little goes a long way. Aim for a part that’s a few millimeters wide with a slight zigzag or irregularity to it (instead of a perfect pencil-straight line). Real parts aren’t usually perfectly straight, so a subtly uneven part can actually appear more natural. In fact, an “imperfect parting can add realism… nobody has perfectly parted hair all the time”. So don’t stress about making it super straight; a gentle curve or zigzag is fine.
After plucking, add some “scalp” color. Using a tiny brush, apply a bit of foundation or concealer (that matches your skin tone) along the inside of the part on the wig’s underside, or even on top of the lace in the part. This makes the base of the part line the color of your skin, so when someone looks at your part, they see what looks like your scalp. You can also use a flesh-toned powder or eyeshadow. One pro tip: set the concealer with a little powder so it doesn’t transfer. The part will instantly look more realistic – many people swear by this trick of using concealer in the part line for their wigs (just like you might do on a lace front hairline). Blend it out so there’s no obvious makeup streak.
If your wig is not a fixed part wig (for example, a full lace or a wig you can part anywhere), experiment with moving the part to find the most flattering and natural look. Sometimes shifting a part from dead-center to slightly off-center can make a wig look more realistic on your head shape. Also consider your own hairline or usual part – placing the wig’s part where you typically part your hair can fool even your close friends into thinking it’s your real hair, since it’s a familiar look for you.
For those with multidirectional parting capability: you might re-train the part by wetting the hair slightly and combing it into the new position, then letting it dry or using a bit of steam to set it.
Images of well-defined wig parts can be found on many wig retailer sites or blogs – you’ll notice in promotional photos, the part line often has a scalp-like effect (that’s the concealer or lace tint at work). If you look up “wig parting concealer before after“, you may find some great visuals on forums or beauty blogs showing how a tiny bit of concealer makes the part look like a real scalp. Also, consider searching on stock photo sites or Pinterest for “wig parting” – some images will illustrate neat tricks like zigzag parts or side parts that you can emulate. By refining the part, you ensure someone glancing at your hairline and part sees nothing but what looks like a natural scalp and hair.
Secret #6: Cutting or Layering the Wig
Customize the cut of your wig (trim, add layers or bangs) to suit your face and create a natural drape. Wigs are mass-produced with generic styles; giving them a personal trim can make a world of difference. Often, synthetic wigs come overly long, all one length, or with blunt ends that don’t move like real hair. By snipping a bit here and there, you can remove that wig-like uniformity.
One of the simplest transformations is to trim the ends. If the wig is very long and you feel it looks fake, consider cutting off an inch or two (or more, if you prefer a shorter look). Even a slight trim can get rid of that factory blunt cut at the bottom. Using sharp scissors or a razor comb, trim in small sections. Wig experts advise to “aim for subtle layers rather than a straight cut” when trimming. Layers will give the hair more movement and prevent it from looking too heavy or doll-like at the ends. You don’t have to create dramatic layers; even lightly point-cutting the ends (snipping into the hair at an angle) will break up a harsh edge.
If you’re comfortable, you can also add face-framing layers. Take small sections in the front and trim at an angle, so the hair curves around your face. This helps the wig flatter your face shape and looks more like a natural haircut you’d get in a salon. Similarly, thinning out very thick areas can help; some wigs have a lot of volume on the sides that could be thinned with thinning shears for a sleeker look. Always cut a little at a time – remember, you can’t put hair back once it’s cut. As one stylist suggests, it’s better to trim in small increments than take off too much at once.
Another popular customization is adding bangs or a fringe (if it suits your style). A wispy bang can hide a less-than-perfect front hairline and instantly make a wig look more “yours.” Just be cautious and cut bangs gradually – start longer than you think (maybe nose-length) and trim up little by little until you reach the desired length. Blunt bangs are tricky to pull off on a wig unless it’s a very high-quality piece, but side-swept bangs or wispy bangs often look great.
If you’re not confident in your cutting skills, it’s well worth taking the wig to a professional hairstylist, preferably one experienced with wigs. They can customize the cut for you. In fact, many wig retailers recommend having a stylist trim the wig while it’s on your head, to perfectly shape it to your face. A stylist can add those subtle layers and texture that make the wig fall more naturally. Think of it this way: people often get haircuts to refresh their look – your wig can benefit from the same! Even high-end wigs sometimes are taken to a stylist for a little personalization.
For inspiration, look for videos or blog posts of wig transformations. There are fantastic YouTube videos where creators show how they cut a synthetic wig to go from fake to fabulous. They often show the cutting process and then the final look being much more realistic. Also, you might find images on beauty blogs of a wig on a mannequin head being trimmed – those can give you an idea of sectioning and technique. The main takeaway is that a bit of strategic cutting (when done right) customizes the wig to you, making it look less like a one-size-fits-all piece and more like your own hair. As one wig specialist put it, adding layers or bangs can be the answer when you’re still wondering “Why doesn’t it look natural yet?“
It adds movement, depth, and that personal touch.
Secret #7: Securing the Wig Properly

Wear and secure your wig correctly so it sits snug and realistic on your head. Even a beautifully customized wig can look fake if it’s worn incorrectly (think: bumps, slips, or an obvious gap between your skin and the wig). Proper application and security are key to a flawless, natural look.
Start with your natural hair preparation. If you have hair under the wig, it needs to be as flat and smooth as possible. Braid your hair into cornrows or small braids, wrap it tightly against your head, or put it in a low bun at the nape – whichever method works for your hair length and thickness. Many women choose to wear a wig cap on top of this (a stocking cap or mesh cap) to hold the hair down and provide a neat surface. The wig cap also provides some friction to help the wig stay on and can protect your hair. Choose a wig cap that matches your skin tone if you have a lace part, so it looks like scalp beneath the wig’s part. Essentially, the flatter your natural hair, the better the wig will look. Lumps or bumps under the wig will not only feel uncomfortable but can make the shape of your head look unnatural.
When putting the wig on, align it with your natural hairline. Place the front of the wig a little past your natural hairline and then slide it back until it sits right where your hairline begins (if you have no hair, use roughly four fingers’ width above your eyebrows as a guide). A common mistake is to pull the wig too low on the forehead or too far back – both can look odd. The wig’s hairline should meet your own as if the wig hair is growing from your scalp at that point.
Once positioned, use the wig’s internal adjustment straps (most have them at the nape) to tighten for a secure fit if needed. Also, make use of the built-in combs or clips inside the wig (usually at the front, sides, and back). Clip those into your hair or wig cap to anchor the wig. For extra security and realism, many people use a wig grip band – this is a velvety band you wear around your head (like a headband under the wig) that grips the wig and keeps it from sliding. It also can eliminate the need for glue. Wig grips come in nude or brown colors to blend in. They are great because they hold the wig snugly in place without any adhesive.
If you’re wearing a lace front and want that ultra-melted hairline look, you might opt to adhere the lace for the day. You can use a skin-safe wig glue or a strong hold hair gel (like Got2b Glued spiking gel or spray) right along your hairline. Apply a thin layer where the lace will sit, press the lace down into it, and blow dry on cool for a few seconds until it sets. This is often called “melting the lace” because it makes the lace edge disappear into your skin. Even without glue, if you’ve tinted the lace (Secret #2) and the wig is secure, you may find it looks seamless. Glue or no glue is up to you – many daily wig wearers avoid adhesive for comfort and hairline health, relying on good fit and maybe a wig grip, while others for special occasions will glue for that extra security and perfection. If you do use glue or spray, always follow instructions and use proper removal techniques (usually an adhesive remover or alcohol) to avoid damaging the wig or your skin when taking it off.
Finally, ensure all the edges are tucked – the wig should cover your hair completely (unless you’re purposefully blending some of your own edges for a half-wig style). Tuck in any stray hairs, adjust the ear tabs so they sit even in front of your ears (these help position the wig correctly). A well-secured wig not only feels more comfortable (no fear of it shifting out of place) but also appears more natural because it stays put exactly where it should. No unexpected gaps, no slippage showing your cap, etc.
For a step-by-step visual of proper wig application, you can look up “how to put on a lace front wig naturally” on YouTube or visit beauty blog tutorials. They often demonstrate starting from natural hair prep (braiding and cap) to aligning the wig, securing combs, and even tying down the lace with a scarf to set the glue (if using). Seeing someone do it can be very helpful if you’re new. Additionally, some stock photo sites have images of women putting on wigs or securing them – those can give you a quick idea of the process. The bottom line is, when your wig is worn correctly and securely, it instantly boosts its realism. People will be focusing on the gorgeous style, not wondering if it’s about to shift or fall off.
Bonus Tips for Wig Longevity

Making your synthetic wig look real is one thing – keeping it looking fresh and natural over time is another. Here are some quick bonus tips to extend the life of your wig and maintain that flawless look:
- Regularly detangle: Synthetic fibers can tangle, especially at the nape. Gently brush your wig with a wide-tooth comb or a wig brush after each use (and before washing). Always start from the ends and work upward to avoid stressing the fibers. Detangling prevents matting and keeps the hair flowing naturally.
- Wash after 6-8 wears: You don’t need to wash a synthetic wig as often as human hair, but product buildup (like sweat, dust, dry shampoo from our shine-reducing trick, etc.) can accumulate. Wash your wig every 6-8 wears or whenever it starts to look dull or smell less than fresh. Use cool water and a shampoo formulated for synthetic wigs (sulfate-free, gentle cleansers). Never use hot water, as it can damage fibers. After washing, apply a conditioner or wig conditioning spray made for synthetic hair to keep fibers soft. Rinse with cool water. Pat dry with a towel and let the wig air dry on a wig stand. Proper washing will revive the wig’s bounce and also restore its natural-looking shine (not too shiny, not too dull).
- Handle with care: When brushing or styling, be gentle. Avoid pulling on the fibers too hard – remember, unlike human hair, they won’t grow back! Use gentle strokes. If you encounter a tough knot, use a detangling spray and work it out slowly with your fingers or a comb. Treat the wig as you would very delicate hair.
- Use wig-specific products: Regular human-hair products can be too harsh or leave residue on synthetic wigs. Opt for shampoos, conditioners, and styling sprays designed for synthetic wigs. These are formulated to clean and condition the fibers without stripping their color or shine. For instance, if you want to add some shine back to a wig that has gotten dull, use a wig shine spray (just a light mist). If you need hold, use a wig hair spray that won’t build up as much. This will keep your wig looking and feeling more like natural hair for longer.
- Proper storage: Always store your wig on a stand or mannequin head when not in use. This helps maintain the style and shape, and prevents tangles. If you don’t have space for a stand, you can also store the wig in a silk or satin bag to reduce friction (silk/satin causes less frizzing than storing in plastic). Keeping the wig in a cool, dry place away from direct sunlight will also prolong its life – sunlight can fade the color over time. Storing it neatly (as opposed to tossing it in a drawer) means it’ll be ready to wear with minimal touch-ups next time.
- Avoid heat and friction: We mentioned not to use heat tools on non-heat-safe wigs (that’s a big no-no). Also avoid other sources of heat: be cautious when opening a hot oven, standing near a BBQ grill, or any high heat source – the heat can frizz the fibers. Friction is another enemy of synthetic wigs; it can cause fraying and tangling (for example, long wigs rubbing against collars can tangle). When wearing a longer wig, consider draping the hair over your shoulder or using a scarf on very windy days to minimize tangles. And try not to sleep in your synthetic wig – constant tossing and turning will create a matted mess by morning. If you must nap in it, use a satin bonnet to cover it.
- Keep it clean (but not over-washed): While you should wash your wig periodically, don’t overdo it. Washing too frequently can wear out the fibers faster. Stick to the recommended schedule. Between washes, you can use a fabric refresher spray (lightly) or a wig deodorizer to keep it smelling nice. And if you’ve used a lot of styling product, do wash it out within a reasonable time; product buildup can make a wig stiff and less realistic, so washing restores its softness.
By following these maintenance tips, your synthetic wig will not only look natural from day one, but stay looking great wear after wear. A well-cared-for wig can last many months (even daily wear for 4-6 months, or occasionally for a year or more). This means you get more value and consistently good hair days!
Common Mistakes to Avoid
When trying to make your wig look real, avoid these common mistakes that can sabotage your efforts:
- Using high heat on a non-heat-safe wig: As mentioned, applying a hot curling iron or straightener to regular synthetic hair is disastrous – the fibers can melt or crinkle irreversibly, “like using a blowtorch on a marshmallow!”. Always verify if your wig is heat-friendly. If not, stick to no-heat methods. And even if it is, keep the heat low to preserve the wig’s life.
- Over-plucking or over-cutting: While plucking the hairline and part (Secret #1 and #5) and trimming the wig (Secret #6) are great techniques, be cautious not to go overboard. Too much plucking in one area can lead to bald spots or a visibly thinned hairline, which is hard to fix. Similarly, cutting off large chunks of hair or very short bangs in one go could ruin the wig’s style. Always modify gradually. You can take more hair off, but you can’t add it back! If unsure, do a little, then wear the wig and see how it looks. It’s a mistake to try to achieve perfection in one session – slow and steady wins here.
- Forgetting to blend or trim the lace: One big telltale sign of a wig is visible lace (or an untrimmed lace front). If you don’t cut the excess lace off your lace front wig, it will obviously show. Trim the lace close to the hairline (in a slight zigzag pattern rather than a straight line, which helps it look more natural). Also, don’t neglect the tinting/makeup step on the lace (Secret #2). An obvious line of lace or lace that’s too light/dark for your skin will draw attention. The mistake here is wearing a lace wig straight out of the box without customization – always cut and blend that lace for a seamless hairline.
- Neglecting your natural hair under the wig: If you just stuff your hair under a wig without flattening it, the wig will sit improperly. Bumps, unevenness, or bits of your hair peeking out can occur. Always prep your hair (braid it, wrap it, use a cap) so the wig has a smooth base. Also, make sure long sideburns or baby hairs of your own are tucked in or gelled down if they don’t match the wig – they can give away the illusion if they pop out. A common mistake is to rush this step; take a few extra minutes to get your base right.
- Incorrect wig placement and fit: Wearing the wig tilted back too far (showing your forehead too much) or too low (almost on your eyebrows) will look odd. Align it with your natural hairline for the most natural result. Also ensure the wig is the right size for your head – a wig that’s too loose may shift around (and tempt you to pull it too low to feel secure), and one that’s too tight might slide or not sit flush. Use those adjustable straps and make sure the ear tabs are even. If your wig consistently doesn’t fit right, you might need a different size. Knowing your head measurements and adjusting accordingly prevents the common mistake of a poorly fitted wig, which is a realism killer.
- Using the wrong care products: This is a subtle mistake that can shorten your wig’s lifespan and make it look fake sooner. Regular hair sprays, gels, or creams can leave residue or even damage synthetic fibers. For example, an alcohol-heavy hair spray can stiffen and dull a synthetic wig. Using a heavy oil or shine serum not meant for synthetics can make the fibers clump or get greasy (and you can’t just wash out oil like on human hair). Stick to products labeled for synthetic wigs, or very light, water-based formulas if you must. Also, avoid over-conditioning; some people think adding lots of conditioner will make a synthetic wig softer, but too much can make it piecey or too shiny. Follow the care instructions and product recommendations for best results.
- Not securing the wig properly: Some folks make the mistake of forgoing clips, combs, or any adhesive and just perch the wig on. The risk? It slips back throughout the day or shifts, exposing your cap or hairline. Always secure your wig (Secret #7). Even a snug wig can benefit from a couple of bobby pins or a wig grip for insurance. Another related mistake is not checking 360° in the mirror after putting the wig on – ensure no edges are lifting, the back is down low enough, and the wig hair covers the cap/hair in back. If you see something off, secure it or adjust before you head out.
Avoiding these mistakes will save you from those “wig mishaps” that can be embarrassing and can undermine all the effort you put into styling your wig. With practice, putting on and styling your wig will become second nature, and you’ll develop a feel for just the right amount of plucking, product, or trimming needed.
Conclusion
A synthetic wig doesn’t have to look synthetic. By applying these 7 secrets – from plucking the hairline and part, to blending the lace, reducing shine, gentle styling, customizing the cut, and securing it correctly – you can make a synthetic wig look real instantly. The transformation can be downright amazing: what starts as an obvious wig can end up looking like natural hair that’s growing right out of your head.
The key is in the details and a bit of initial effort. Spend a little time customizing your wig with these realistic synthetic wig tips, and you’ll be rewarded with a confident, undetectable look. Remember, even small tweaks like a dash of powder on the wig or a few snips with the scissors can yield huge improvements in realism. Don’t be afraid to experiment – synthetic wigs are quite forgiving and made to be played with. If one method doesn’t give you the desired result, try another until you love what you see.
Lastly, enjoy the process! Part of the fun of wigs is the ability to change your style and try new looks. With these wig transformation hacks in your arsenal, you can switch up colors and cuts while still looking natural. Practice your technique, take inspiration from wig-styling tutorials and beauty bloggers (there are countless resources and communities out there), and soon you’ll be a pro at making any wig look flawless. Go ahead and rock that synthetic wig with confidence – armed with these secrets, no one will be able to tell it’s not your real hair!


